
Module in angular
In this tutorial we will discuss and understand module in angular , one of the important part of our angular application. Will be discussing as
- What is the module in angular?
- What is use of module?
- What are the different part of NgModule Decorator?
- How to create new module?
What is module in angular
Angular module is used to group an interrelated set of Angular primitives, including components, directives and pipes that are closely related and meant to be used together.
In Angular, a module is a mechanism to group components, directives, pipes and services that are related, in such a way that can be combined with other modules to create an application.
In other words, Angular modules are classes. In a class, we can define public or private methods. The public methods are the API that other parts of our code can use to interact with it while the private methods are implementation details that are hidden. In the same way, a module can export or hide components, directives, pipes and services. The exported elements are meant to be used by other modules, while the ones that are not exported (hidden) are just used inside the module itself and cannot be directly accessed by other modules of our application.
What is use of module in angular
Angular is a modular framework. Modular development is one of the most important features of software development.
So, in Angular, you would like to create separate physical typescript or JavaScript files that will have self-contained code. Then definitely you would have some kind of reference mechanism by using which the modules can be referred from the places where you want to use these modules.
Every Angular app has at least one module, which is called the root module or app-level module. You bootstrap this app-level module or root module to launch the application.
In a small app, the root module or app-level module is enough to organize different components, directives, pipes, and services. But as the app grows, you should refactor the root module into feature modules, which represents related functionality. You may then import these modules in the app-level module if you want these modules to be eagerly loaded or in the routing module through routes if you want them to be lazily loaded.
Understanding modules in angular Or NgModule decorator in details
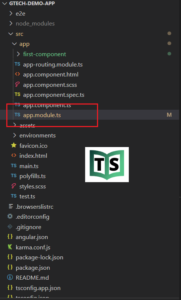
When we create a new angular project using the Angular CLI command, one module i.e. AppModule (within the app.module.ts file) is created by default within the app folder which you can find inside the src folder of your project.
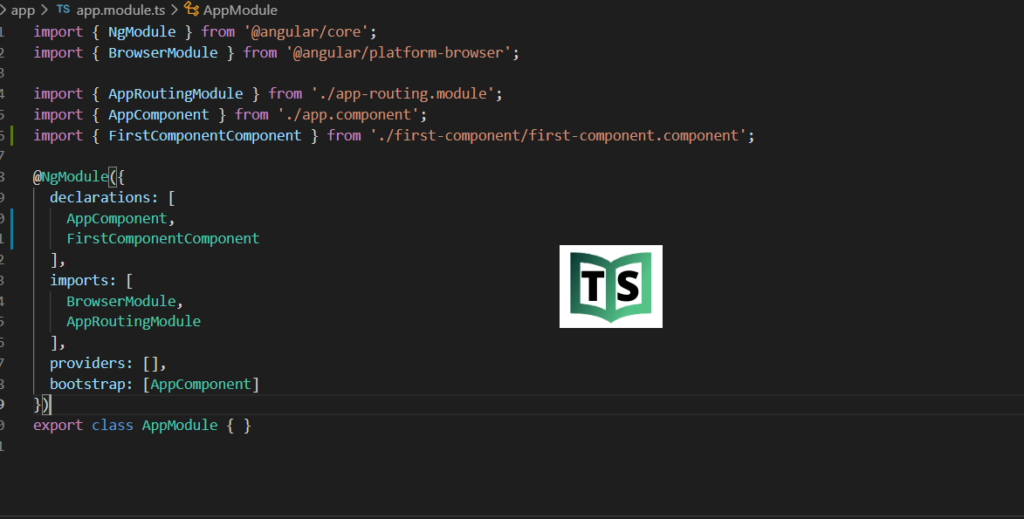
For any angular application, there should be at least one module. The AppModule (app.module.ts file) is the default module or root module of our angular application. This is already discussed in our previous video tutorial of bootstrapping in angular. Let us first understand this default module and then we will see how to create and use our own modules and it looks as follows
import { NgModule } from '@angular/core';
import { BrowserModule } from '@angular/platform-browser';
import { AppRoutingModule } from ‘./app-routing.module’;
import { AppComponent } from ‘./app.component’;
@NgModule({
declarations: [
  AppComponent
],
 imports: [
   BrowserModule,
   AppRoutingModule
],
providers: [],
bootstrap: [AppComponent]
})
export class AppModule { }
To be able to define modules we have to use the decorator NgModule.
In the example above, we have turned the class AppModule into an Angular module just by using the NgModule decorator. The NgModule decorator requires at least three properties: imports, declarations and bootstrap.
Declaration
It is an array of components created. If any new component gets created, it will be imported first and the reference will be included in declarations.
The declarations array is an array of components, directives, and pipes. Whenever we add a new component, first the component needs to be imported and then a reference of that component must be included in the declarations array. By default AppComponent (app.component.ts file) is created when you create a new angular project and you can find this file within the app folder which you can find inside the src folder. If you open the app.component.ts file, then you will find the following code.
declarations: [ AppComponent ]
Import
It is an array of modules required to be used in the application. It can also be used by the components in the Declaration array. For example, right now in the @NgModule we see the Browser Module and AppRoutingModule are default imported.
imports: [ BrowserModule, AppRoutingModule ]
Providers
In this array, you specify all the services that can be used across the app in any component, directive, or pipe.
providers: []
Whenever you create any service for your application, first you need to include a reference of that service in the provider’s section and then only you can use that service in your application. In our upcoming tutorial, we will discuss in detail.
Bootstrap
In this array, you specify the component that should be loaded at the start of the app. At the moment we have only one component i.e. AppComponent and this is the component that is going to be executed when our application run. So, this AppComponent is included in the
bootstrap: [AppComponent]
How to create a Module in Angular
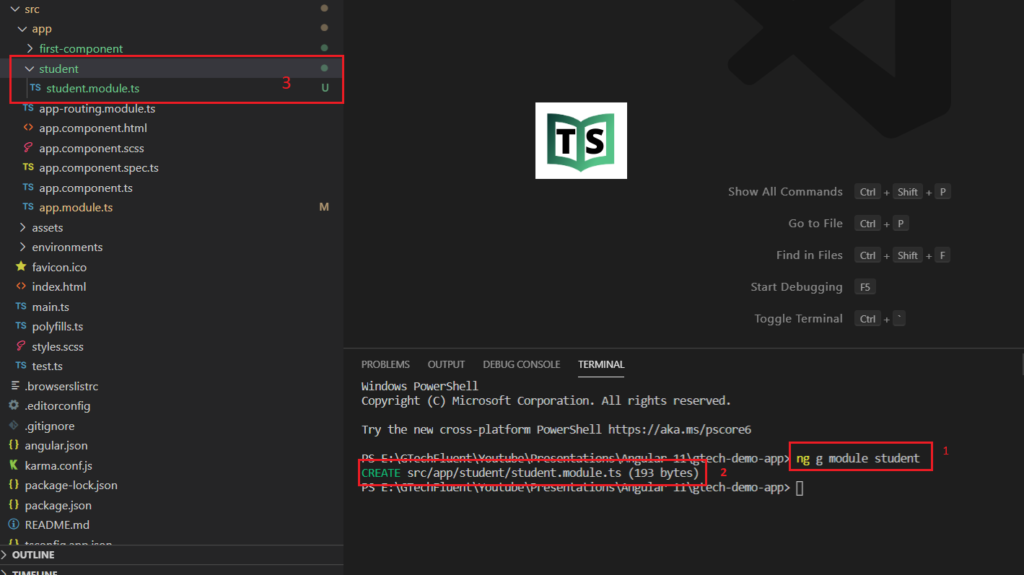
To create a module in angular using Angular CLI, we need to use the command as ng g module moduleName. In this g means generate and you use either g or generate to create the module.
We will create a module called Student. So, first, let open the terminal console in visual studio code and then type below command and press enter.
ng g module student
Once the module is created and It ss created within the src => app => student folder. So this one example on module so relative component to student will be added inside student and will be imported into student.module.ts file. In this way we will create any number of modules in our application.
You can watch our video version of this tutorial with step by step explanation.