Property Binding In Angular
In this tutorial we will discuss and understand about property binding in angular 11 and we explain below points in details.
- What is Property Binding?
- How to use property Binding with an example?
- What is Content Security for Malicious Content?
- Difference Between Property Binding and Interpolation
What is property binding?
Property Binding is a one-way data-binding technique. In property binding, we bind a property of a DOM element to a field which is a defined property in our component TypeScript code. Actually, Angular internally converts string interpolation into property binding.
The Property Binding in Angular Application is used to bind the values of component or model properties to the HTML element. Depending on the values, it will change the existing behavior of the HTML element.
Property Binding Syntax
The Property Binding uses the following Syntax
[binding-target]=”binding-source”
The binding-target (or target property) is enclosed in a square bracket []. It should match the name of the property of the enclosing element.
Binding-source is enclosed in quotes and we assign it to the binding-target. The Binding source must be a template expression. It can be property in the component, method in component, a template reference variable or an expression containing all of them.
Whenever the value of Binding-source changes, the view is updated by the Angular.
How to use the Property Binding in Angular Application?
In order to understand how to use property binding in the angular application.
Open the studentdetails.component.ts and one property name it as ‘title’ and set title value as below.
title: string = 'Welcome to Gtechfluent Tutorials';
Open studentdetails.component.html and add h1 tag. We need to specify the HTML element property (in our example, the HTML element is h1 and the property is innerHTML) in a pair of the square brackets. Then you need to specify the component class property (in our example, the component class is StudentdetailsComponent and the property is Title) in a pair of single quotes. Then at runtime, this property value will be assigned to the HTML Property.
<h1 [innerHtml]="title"></h1>
We can achieve the same thing using property binding as we achieve using Angular Interpolation. In our previous tutorial of interpolation, we have achieved the same thing using interpolation technique.
What is the difference between Property Binding and Angular Interpolation?
The Angular Interpolation and Property binding both flows the values from a component to the view template i.e. in one direction.
Now, you may have one question i.e. we can achieve the same thing using both property binding and angular interpolation, then what is the difference between them or when to use one over another.
Interpolation in Angular is just an alternative approach for property binding. It is a special type of syntax that converts into a property binding.
But there are some scenarios where we need to use interpolation instead of property binding. For example, if you want to concatenate strings then you need to use angular interpolation instead of property binding as shown in the below.
import { Component } from '@angular/core'; @Component({ selector: 'app-root',
template: `
<div>
<img src="https://angular.io/assets/images/logos/angular/{{imageName}}" />
</div>
` }) export class AppComponent {
imageName: string = "logo-nav2x.png";
}
Property Binding with Boolean Data.
When you are working with non-string values like Boolean to set the property value of an HTML element, then you need to use property binding instead of interpolation. For example, if you want to disable a button click event, then you need to set the disabled property of the button element using the property binding as shown in the below code.
isEnabled: boolean = false;
studentdetails.component.html
<button [disabled] = 'isEnabled'>Click Here</button>
With the above changes in place, it will display the button in the browser which is not clickable. Let see what happens if we use angular interpolation.
Angular Intepolation with Boolean Data.
Please modify the studentdetails.component.cs file as shown below to use angular interpolation to set the disabled property of the button element. Here, we set the property value to false.
isEnabled: boolean = false;
studentdetails.component.html
<button disabled ={{IsDisabledClick}>Click Here</button> With the above changes in place, irrespective of the isEnabled property value of the component class, the button is always disabled. Here we set the IsDisabled property value as false but when you run the application, it will not allow the button to be clickable.
Content Security with String Interpolation
From the security point of view, both Angular data binding and Angular Interpolation protect us from malicious HTML content before rendering it on the web browser. Let us understand this with an example. In the following example, we are using angular interpolation to bind the malicious <script> tag.
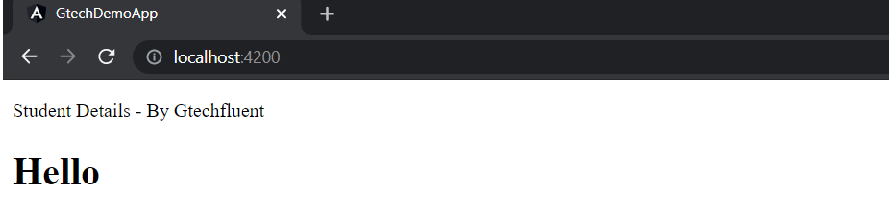
maliciousText = "Hello <script>alert('You are hacked')</script>";<h1>{{maliciousText}}</h1>Now, when we run the application, the Angular interpolation sanitizes the malicious content and displays the following in the browser.
 Content Security with Property Binding
maliciousText = "Hello <script>alert('You are hacked')</script>";<h1 [innerHtml]='maliciousText'></h1>
Now, when we run the application, the Property Binding will not display malicious content and displays the following in the browser.